Laser Assignments:
1)Notebook covers
2)Water Bottle
3)3D puzzle
1)Notebook covers
2)Water Bottle
3)3D puzzle
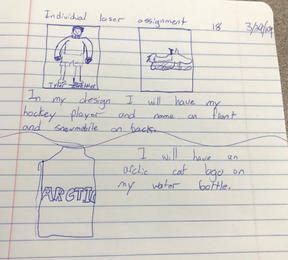
Notebook Cover
To start off creating the notebook covers you had to create and illustrator document with the size of the space we have. After that I needed to come up with text for each side in which my name on the front. Next I would need need to find pictures from the internet and copy and past them into the illustrator document. I would need to Expand and outline my project to make it a vector. Finally I would need to go down to the shop and log into the computer down there and set up the print and put the image in the corner. I printed and obtained the final product.


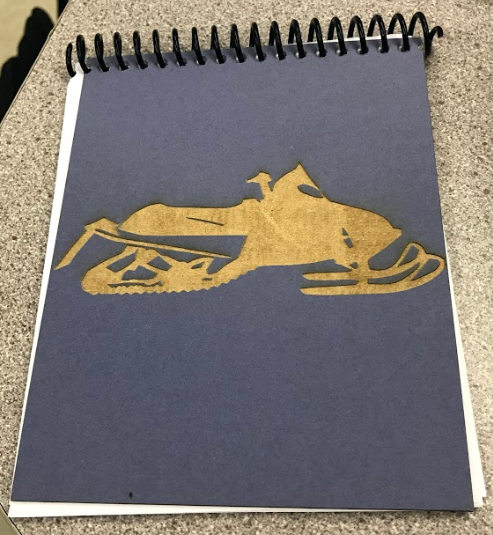
Final Product
Water Bottle
In the process of creating the water bottle i needed to measure the water bottle to see how much room i had to engrave my design on to it. I opened an illustrator document and copy and pasted an image for the internet into it. Then I sized it to the dimensions I had. I made the image a vector so it wasn't pixels. I then rotated the image 270 degrees because when we are at the laser that is the way it rolls on to the water bottle. When I get down there I bring up the program and change the settings to the right material so it engraves correct. I then fit the water bottle in the holder and clamp it together. I then line up the laser in the edges to make sure it doesn't run of the edge. Finally I press print and after a short 10 minutes I have my final product.


What I Learned
In this rotation I used the laser enough to know how to use it properly with confidence in my work. I also learned how to use and set up a rotaional jig which helps you engrave on a circular object.
